
How to build a mason bee house
Story by Sue Hughes
The Problem
If you’re like me, you’ve entertained the idea of beekeeping – until the over-$100 starter kits, ridiculous outfits, and the prospects of a sticky, syrupy harvest caused that thought to make a beeline right out of your head. Yes, I want to save the world’s dwindling bee population and, more importantly, provide pollinators for a more prolific tomato crop, but I really don’t want to spend that much money … or get stung.
The Solution: Mason Bees!
Mason bees pollinate just like other bees, but they don’t make honey and, best of all, they don’t sting (unless under severe distress). These North American natives are as docile and safe as birds and, like birds, you can attract them to your garden by building them a house. While there are numerous mason bee houses on the market, they’re easy and inexpensive to build.
A Bee’s Life
Mason bees are loners – no hive or queen – and usually nest in reeds or tunnels abandoned by woodborers. In the deepest part of their holes, females form an egg chamber with mud, collect a loaf of pollen and nectar, lay an egg on the pollen, and then seal up the chamber with more mud. They repeat this process until their tunnel is full of egg chambers.
These hard-working little bees only live for six to eight weeks, usually from the middle of March to the middle of May – just the right time for pollinating fruit trees and berries. Each female may occupy four to six tunnels and lay up to 36 eggs.
Mason bee eggs hatch within a week. The larvae eat the pollen and after four to six weeks, they transform into pupae. In another two to four weeks, or by mid-July, the pupae transform into adults and occupy the cell until the following spring.
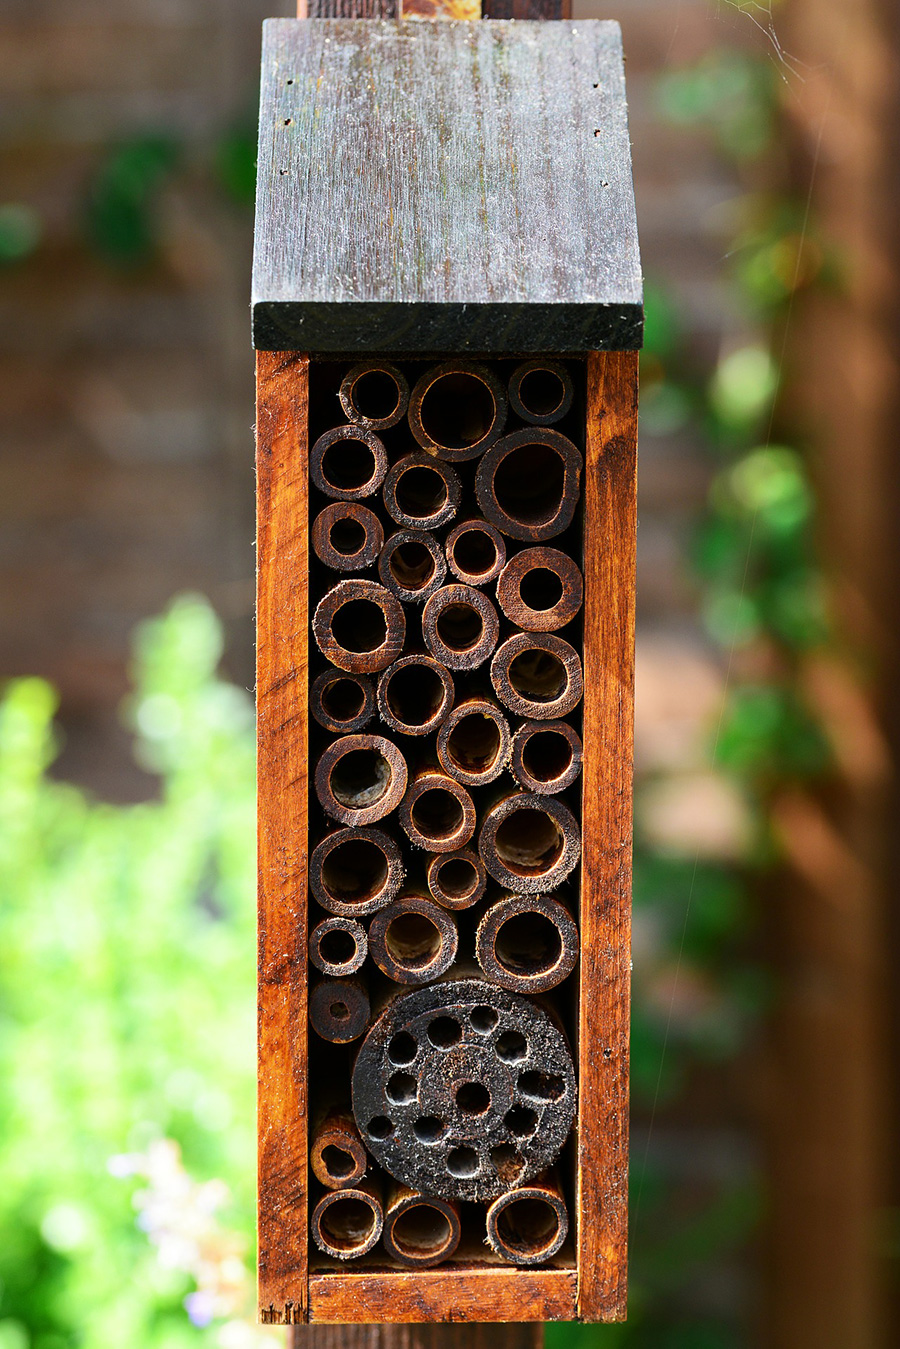
Bee House Specifications
Mason bees nest in almost any properly sized hole – from ¼-⅜ inch in diameter and 4-6 inches long. That’s pretty much all they need.

An easy design is simply drilling holes on the long side of a 6 to 18-inch long block of 6×6 wood. Using a 5/16 drill bit, make each tunnel 5 inches deep – not all the way through – and an inch or so apart. With that block of wood serving as the basis or your house, you can add color, trim, a roof … whatever you’d like.
Alternatively, you can stuff a plastic or metal coffee can with extra wide plastic straws (like those for smoothies). Fill in the rest of the space with natural filler – sphagnum moss, dried grass, straw – so the straws don’t move around.


Location and Timing
Securely mount your finished bee house at least 3 feet above the ground, preferably where it receives morning sun. Since mason bees are cold blooded, a good dose of sunshine in the morning gets them warmed up and ready to forage. A south-facing house is optimal, but east or west is acceptable. Fasten the house in place so it won’t be jarred, jolted, or knocked over, which could fatally dislodge the larval bees from their pollen food supply.
The best time to put a newly built mason bee house on the market is in spring after the ground has thawed. That’s when females are looking to lay their first batch of eggs. Within two weeks you’ll likely observe the first occupants entering and leaving the holes they selected.
Mason Bee House Do’s and Don’ts
- DO locate your bee house well inside the females’ foraging range – within 100 yards of your garden.
- DO cover the tunnels of your bee house with chicken wire to keep out birds and other predators.
- To make life easier for expectant mother bees, DO provide a saucer of mud in your garden near the bee house.
- If you build a bee house from wood, DON’T use treated wood.
- DON’T position your bee house in an open area subject to high wind or temperatures.
- After setting out a bee house in the spring, DON’T move it until at least November.
- DON’T spray insecticides on or around bee houses, especially during the day when females are out and about.